Light-EV guide

Design custom e-bike and e-moto battery packs that actually fit the chassis.

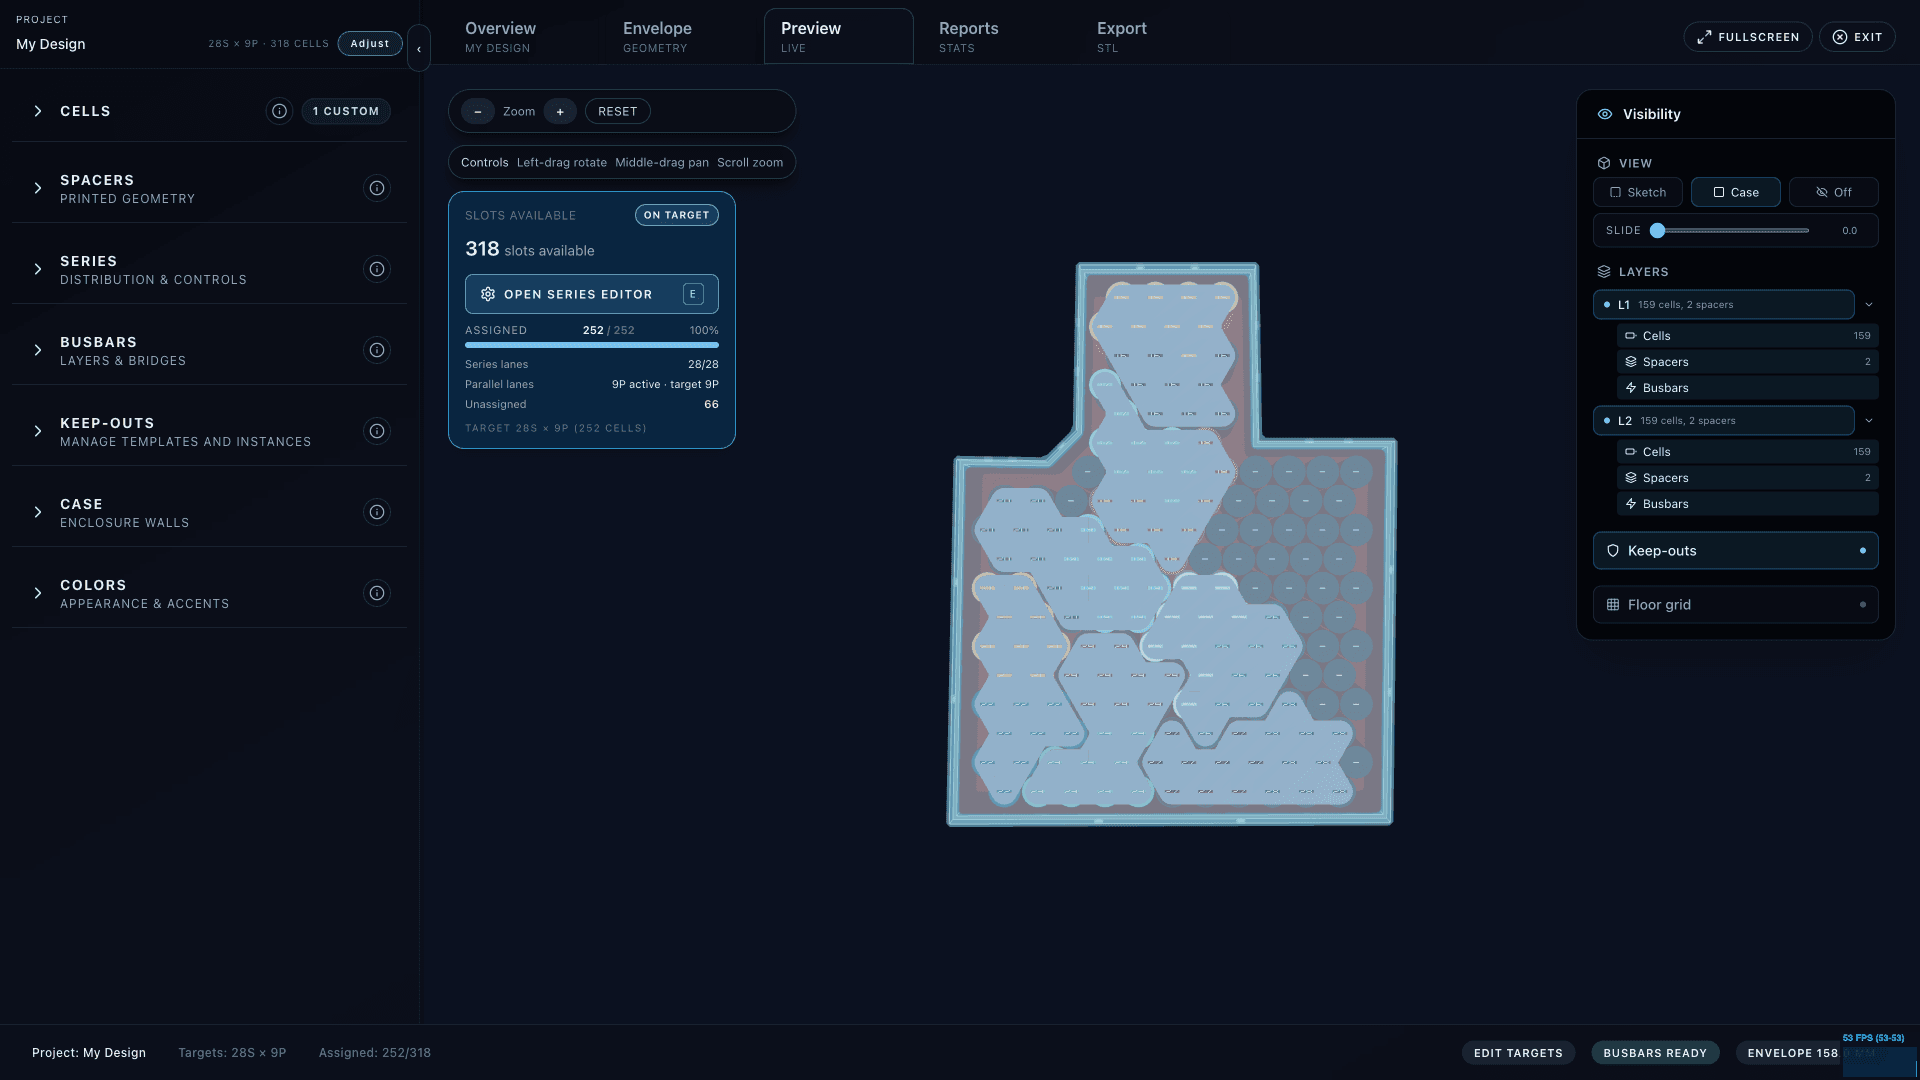
BatteryBee is strongest when the geometry is awkward: triangle packs, downtube housings, e-moto chassis cavities, rebuilds, and custom conversions that need spacers, cases, and clean cable routing instead of generic brick dimensions.

Best fit: custom e-bike, e-moto, and scooter packs where the geometry, service access, and fabrication details need to be worked out before the build.

What you should solve before fabrication

  • Frame clearance and install path
  • Removable battery retention and latch strategy
  • BMS, fuse, and connector packaging
  • Service lid and cable exit locations
  • Spacer, case, and busbar manufacturability
BatteryBee 3D preview for a custom battery pack
Use the 3D view to validate clearances before you print or machine the enclosure

Where BatteryBee helps most

The goal is not to replace every downstream tool. It is to keep the pack geometry, electrical targets, and fabrication outputs tied together while you are still making packaging decisions for a real light-EV chassis.

Frame triangle packs

Trace the real cavity, reserve keep-outs for bottle bosses and weld intrusions, then design the enclosure around the frame instead of after the fact.

Downtube and side-access packs

Plan cable exits, service lids, and mounting clearances before you commit to a case design that is impossible to install or service.

Rebuilds and one-off conversions

Fork the design, adjust targets or spacing, and keep the geometry attached to the exact pack revision you want to build next.

Recommended workflow

  1. Trace the frame cavity and add keep-outs for hardware, bosses, and cable runs.
  2. Set the cell format and S/P goals so the layout and pack metrics converge on the real electrical target.
  3. Check service access, connector exits, and wall thickness in the 3D preview before you model yourself into a corner.
  4. Add lids and cutouts only after the envelope and cell stack are stable.
  5. Export the case, lids, spacers, and busbar geometry for the exact design revision you intend to build.

Build checks

  • Can the pack actually be installed and removed without hitting the frame or suspension hardware?
  • Do the charge and discharge leads leave the case from a serviceable, strain-relieved location?
  • Is there room for the BMS, fuse, switchgear, and any thermal padding you plan to use?
  • Do the printed spacer and enclosure dimensions still make sense for your printer or fabrication process?
  • If the design changes after quoting or ordering, do you have a locked snapshot for the build revision?

Ready to start?

Start with the free workspace, then use the docs to lock in the enclosure, exports, and manufacturable details of the exact revision you plan to build.